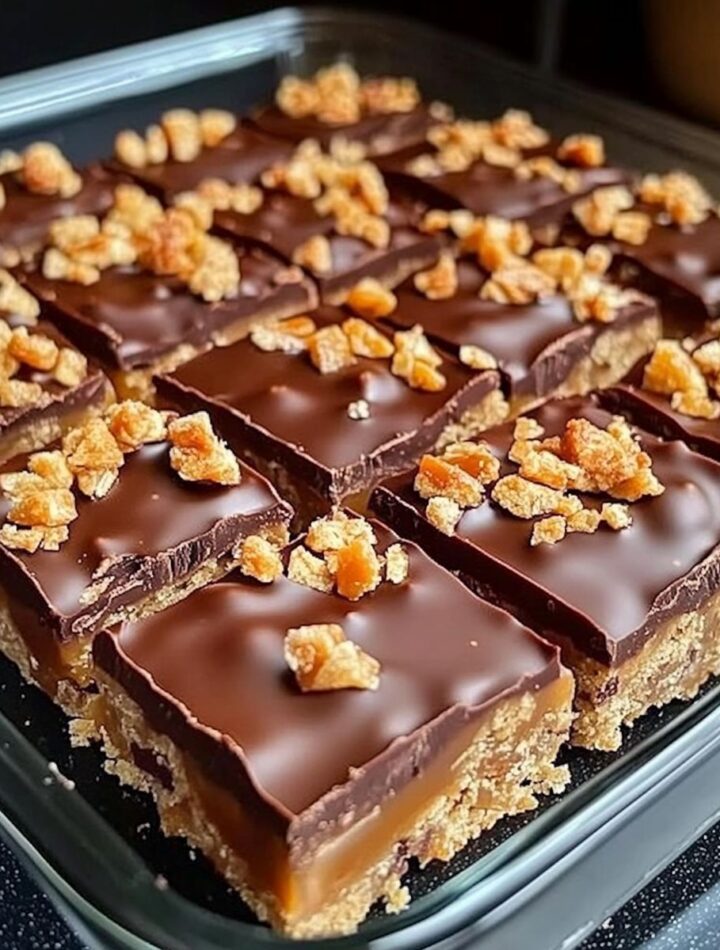
These No-Bake Caramel Chocolate Crunch Bars are the kind of treat that disappears before you even get a chance to put the leftovers away. They’re rich, chewy, crunchy, and loaded with layers of chocolate and buttery caramel flavor. Best of all, there’s no oven required. Just melt, mix, layer, chill, and slice.
This recipe is perfect when you want an easy dessert for a party, holiday tray, bake sale, or late-night sweet tooth. The combination of crisp cereal, creamy caramel, and chocolate makes every bite seriously addictive.
Ingredients
For the Crunch Layer:
- 4 cups crispy rice cereal
- 1 cup semi-sweet chocolate chips
- ½ cup creamy peanut butter
- 2 tablespoons unsalted butter
For the Caramel Layer:
- 1 cup soft caramel candies, unwrapped
- ¼ cup heavy cream
- 2 tablespoons unsalted butter
- 1 teaspoon vanilla extract
- ¼ teaspoon salt
For the Chocolate Topping:
- 1½ cups semi-sweet or milk chocolate chips
- 1 tablespoon coconut oil or shortening
- ¼ cup chopped pecans or peanuts, optional
- Flaky sea salt, optional
Instructions
1. Prepare the pan
Line a 9×13-inch baking pan with parchment paper, leaving some extra paper hanging over the sides. This makes it much easier to lift the chilled bars out later. Lightly grease the parchment if desired.
2. Make the crunchy chocolate base
Place the chocolate chips, peanut butter, and butter in a microwave-safe bowl. Microwave in 20- to 30-second intervals, stirring well after each interval, until completely smooth.
Pour the melted chocolate mixture over the crispy rice cereal. Gently fold everything together with a large spatula until the cereal is evenly coated. Be careful not to crush the cereal too much—you want plenty of crunch.
Transfer the mixture to the prepared pan and press it into an even layer. Use the bottom of a measuring cup or a piece of parchment paper to gently compact it. Set aside.
3. Make the caramel layer
Add the unwrapped caramel candies, heavy cream, and butter to a small saucepan. Heat over low to medium-low heat, stirring frequently, until the caramels melt into a smooth, glossy sauce.
Remove the pan from the heat and stir in the vanilla extract and salt. Let the caramel cool for a couple of minutes so it isn’t piping hot.
Pour the caramel evenly over the chocolate crunch layer. Spread it gently with a spatula, making sure it reaches the corners.
4. Add the chocolate topping
Melt the remaining chocolate chips with the coconut oil in a microwave-safe bowl. Again, use short intervals and stir between each one until smooth.
Pour the melted chocolate over the caramel layer and spread it into a thin, even topping.
If you love a little extra texture, sprinkle chopped pecans or peanuts over the chocolate while it is still soft. A light sprinkle of flaky sea salt also gives these bars that sweet-and-salty flavor that is hard to resist.
5. Chill until firm
Place the pan in the refrigerator for at least 2 hours, or until all the layers are completely firm.
For especially clean slices, you can chill the bars for several hours or even overnight.
6. Slice and serve
Use the parchment paper to lift the entire slab from the pan. Place it on a cutting board and let it sit at room temperature for about 5 minutes.
Use a sharp knife to cut the bars into squares or rectangles. For neat edges, wipe the knife clean between cuts.
Helpful Tips
For the best texture, avoid overheating the chocolate or caramel. Gentle melting keeps everything smooth and prevents the chocolate from becoming thick or grainy.
If your caramel seems too thick, add another tablespoon of heavy cream and warm it gently until it reaches a spreadable consistency.
You can easily customize these bars, too. Try using dark chocolate for a richer flavor, milk chocolate for extra sweetness, or white chocolate for a fun contrast. Chopped almonds, toasted pecans, peanuts, or even crushed pretzels can be added for more crunch.
If you’re making these for a crowd, cut them into small squares. They’re quite rich, so a little piece goes a long way!
Storage
Store the finished bars in an airtight container in the refrigerator for up to 1 week. Place parchment paper between layers if stacking them.
You can also freeze the bars. Wrap individual pieces tightly and place them in a freezer-safe container for up to 2 months. Thaw them in the refrigerator before serving.
Recipe Details
Prep Time: 20 minutes
Chill Time: 2 hours
Total Time: 2 hours 20 minutes
Yield: 24 bars
These No-Bake Caramel Chocolate Crunch Bars are proof that an amazing dessert doesn’t need an oven. With a crispy chocolate base, silky caramel center, and smooth chocolate topping, they’re easy enough for a weeknight treat but impressive enough for any special occasion.