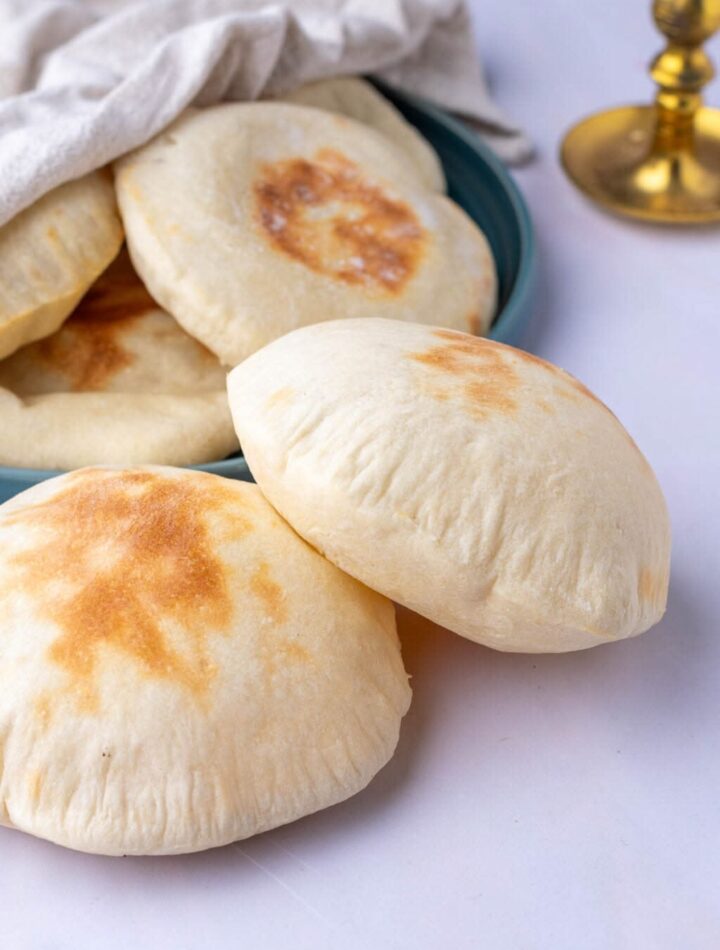
There’s something seriously satisfying about watching a simple ball of dough puff into a beautiful pocket of homemade pita. These Sourdough Pita Breads are soft, lightly chewy, and packed with that subtle tang you only get from a naturally fermented starter. They’re perfect for stuffing with grilled chicken, falafel, roasted vegetables, eggs, or anything else hiding in your fridge.
The best part? You don’t need commercial yeast. Your active sourdough starter does all the heavy lifting, giving the pita a wonderful texture and plenty of flavor.
This recipe is also a great way to use your sourdough starter when you want something other than a loaf of bread. Once you get the hang of the cooking process, you’ll be making these homemade pitas on repeat.
Why You’ll Love This Recipe
These pitas are soft enough to fold without cracking, but sturdy enough to hold your favorite fillings. The dough is made with everyday ingredients, and the fermentation time gives it a deeper flavor than store-bought pita.
Cooking the pita over high heat is the real trick. When the dough hits a properly heated surface, steam builds inside and separates the layers, creating that classic pocket.
Ingredients
- 1 cup (240g) active sourdough starter
- 1 ½ cups (360g) warm water
- 3 cups (400g) bread flour
- 1 cup (120g) all-purpose flour
- 1 ½ teaspoons salt
- 1 tablespoon olive oil
Instructions
1. Mix the Dough
Add the active sourdough starter and warm water to a large mixing bowl. Stir until the starter loosens into the water.
Add the bread flour and all-purpose flour. Mix with a wooden spoon or your hands until no dry patches remain. The dough will look rough and slightly sticky at this stage. That’s completely fine.
Cover the bowl and let the dough rest for about 30 minutes.
2. Add the Salt and Oil
Sprinkle the salt over the dough and drizzle in the olive oil. Work everything into the dough using your hands.
Knead gently for several minutes until the dough starts feeling smoother and more elastic. You don’t need to beat it up like a traditional bread dough. A little patience goes a long way here.
3. Let the Dough Ferment
Cover the bowl and leave the dough at room temperature for approximately 4 to 6 hours, depending on the temperature of your kitchen.
During this time, the dough should become noticeably lighter and puffier. You’re not necessarily looking for it to double in size.
For extra flavor, you can place the dough in the refrigerator after the initial fermentation and let it rest overnight. The longer fermentation develops a more pronounced sourdough flavor.
4. Divide the Dough
Turn the dough onto a lightly floured counter. Divide it into 8 equal pieces.
Shape each piece into a smooth ball by gently pulling the edges underneath. Place the dough balls on a lightly floured surface, cover them with a clean kitchen towel, and let them relax for about 30 to 45 minutes.
This resting period makes rolling much easier.
5. Roll the Pitas
Heat a cast-iron skillet, griddle, or heavy-bottomed pan over medium-high to high heat. Let it get very hot before you start cooking.
Take one dough ball and roll it into a circle about 6 to 7 inches wide. Try to keep the thickness as even as possible.
Don’t make the dough too thin. A little thickness is important because you need enough dough to trap steam and create the pocket.
6. Cook the Pita
Place one rolled pita onto the hot, dry skillet.
Cook for about 30 to 60 seconds. You should start seeing bubbles appear on the surface.
Flip it and cook the other side for another 30 to 60 seconds. Flip again if needed.
If your pan is hot enough, the pita should begin puffing up dramatically. That big balloon-like puff is exactly what you want.
Once cooked, transfer the pita to a clean kitchen towel and cover it immediately. Keeping the bread covered traps some moisture and helps keep the pita soft.
Repeat with the remaining dough.
The Secret to Puffy Sourdough Pitas
If your pitas aren’t forming pockets, don’t panic. The most common problem is usually the cooking temperature.
Your skillet needs to be properly hot before the first pita goes in. If the pan is only moderately warm, the dough can cook slowly instead of creating enough steam to inflate.
Rolling also matters. Try to roll the dough evenly rather than leaving thick edges or thin centers.
Another important tip is to avoid adding too much flour while rolling. Excess flour can burn in the pan and make the pita taste bitter.
How to Serve Sourdough Pita
Fresh pita is incredibly versatile. Slice it open and fill it with chicken shawarma, falafel, hummus, cucumber, tomatoes, lettuce, and a creamy sauce.
You can also cut the pita into wedges and toast them until crisp for homemade pita chips.
For breakfast, try stuffing one with scrambled eggs, cheese, and avocado. Or use warm pita as a simple side for soups, stews, grilled meats, or roasted vegetables.
Storage
Let the pitas cool completely before storing them.
Keep them in an airtight container or zip-top bag at room temperature for up to 2 days. For longer storage, freeze the pitas with parchment paper between them and place them in a freezer-safe bag.
They can be frozen for up to 3 months.
To serve, thaw at room temperature and warm briefly in a skillet, oven, or microwave. A little heat brings back their soft, fresh texture.
Recipe Tips
- Use an active, bubbly sourdough starter for the best rise.
- Make sure your cooking pan is very hot.
- Roll each pita evenly.
- Don’t overcrowd the pan.
- Keep cooked pitas covered with a towel so they stay soft.
- If your kitchen is cold, fermentation may take longer.
- Avoid adding excessive flour when shaping the dough.
Frequently Asked Questions
Why didn’t my sourdough pita puff?
The skillet may not have been hot enough, or the dough may have been rolled unevenly. A properly heated pan and even thickness are key to creating the steam pocket.
Can I make these with whole wheat flour?
Yes. Replace part of the flour with whole wheat flour. Keep in mind that the pitas may be slightly denser and have a more hearty flavor.
Can I prepare the dough ahead of time?
Absolutely. Sourdough pita dough works beautifully with an overnight fermentation in the refrigerator. Bring it out, divide it, let the portions relax, and then roll and cook.
Can I freeze homemade pita?
Yes. Once completely cool, stack the pitas with parchment between them and freeze in an airtight bag for up to 3 months.
Can I use sourdough discard?
For the best puff and texture, use an active starter. Discard that has not been recently fed won’t provide the same fermentation power unless you add another leavening method.